There are few agents quite like Killjoy when it comes to demolishing the opposing team’s attack strategies in the blink of an eye, and with the right setups, you too can harness the power of VALORANT’s biggest tech nerd.
With VALORANT’s rotating map pool for competitive play, it can be hard to remember so many swarm grenade and turret combinations. To find the best Killjoy Split setups, you’ll need to play around a bit and be adaptable.
If you’re ready to load into Split, or maybe the map is on the dock for this week’s VALORANT Premier mode, here are a few Killjoy setups that will have the map locked down.
The best Killjoy setups on Split in VALORANT
Split A Site
There are two areas where you can place a setup on Split’s A site. This site is unique because even though there is technically only one choke point to gain access to the site itself, many attacking teams will choose to take control of A Heaven, or Tower, first.
One of your options as a Killjoy player on A site is to hold the entire Tower/Heaven area with your utility. The key here is to be able to catch enemies coming either from A Ramps or Ropes who are trying to take control of Heaven to fully execute an A Site spike plant.
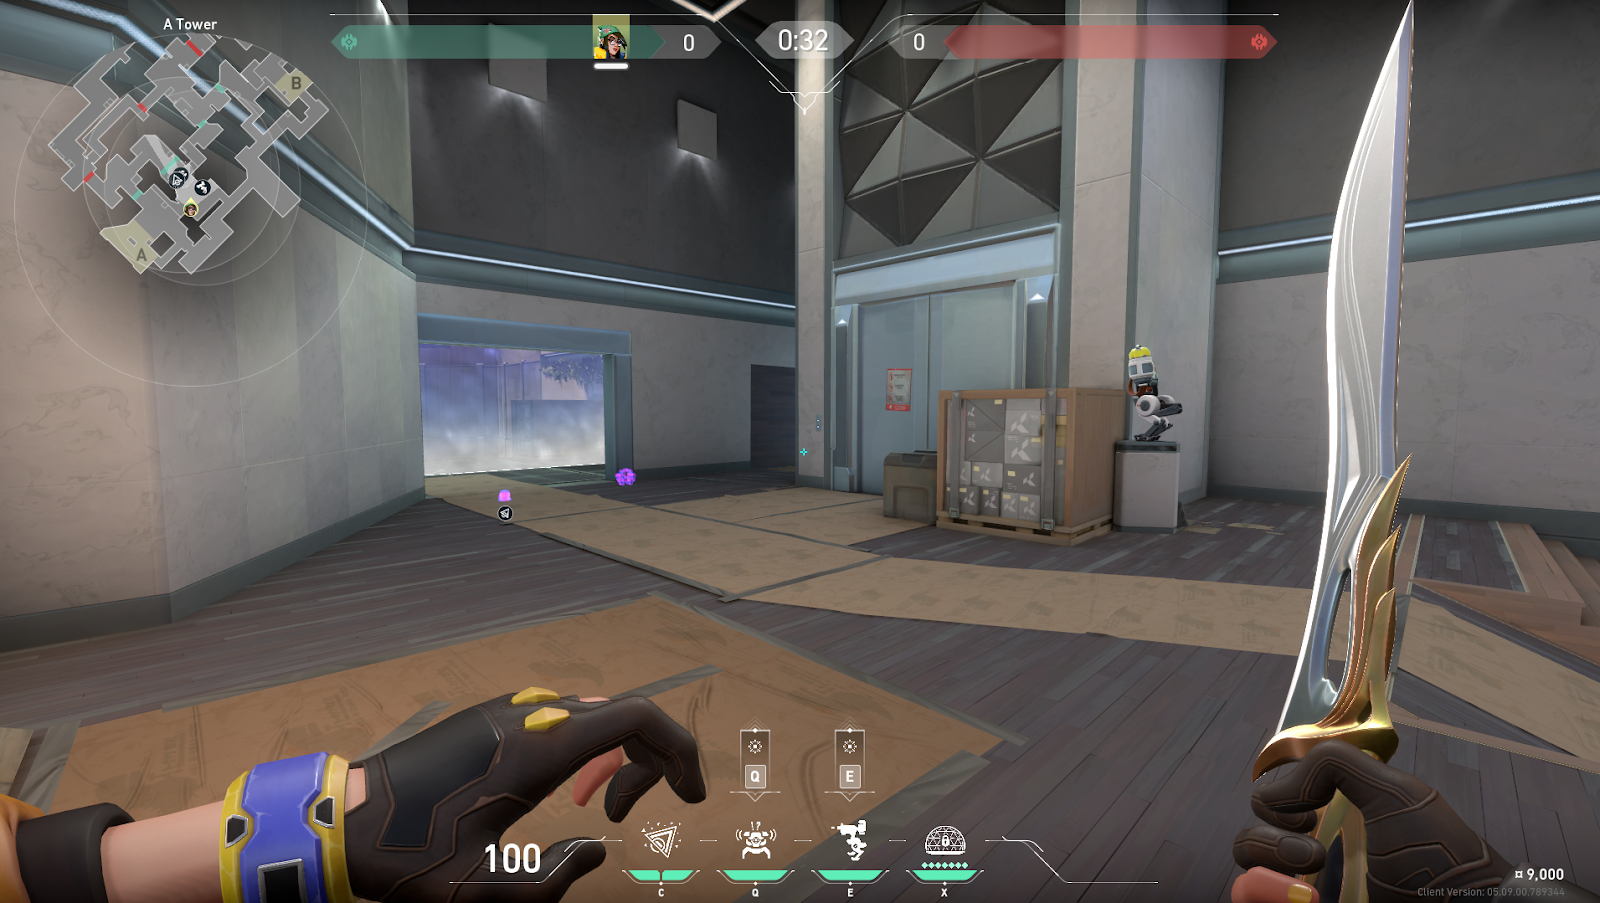
Set up your Turret so it can be the first indicator of enemies pushing up A Ramp. This allows you to sit farther back and avoid having to peek and potentially get picked off. From here, you can try peeking with your turret up if you want to be aggressive or use it as an informational tool for the rest of your team.
Place one Swarm Grenade inside the choke point from A Ramps to A tower, and an Alarmbot right on the other side of the wall, so your enemies can’t shoot it down. These two pieces of utility are excellent deterrents to prevent enemy pushes and catch them off guard, especially if they are trying to execute quickly.
The general rule of thumb for Swarm Grenades is to wait about half a second to a full second after your Alarmbot is activated for the best overall damage.
This Alarmbot placement will also be the first point of contact if a sneak lurk gets by your mid-defenses and tries to flank from ropes. If that Alarmbot goes off, activate the Swarm Grenade for maximum damage, and then peek with your team to catch your enemies trying to escape. You can save your other grenade for a retake or place it on another site if the enemies rotate.

Another option is to set up in a way that focuses on the main choke into A site. With all of Killjoy’s annoying utility layered on top of each other at one deadly chokepoint, good luck to all attackers trying to get through this setup.
Plant your Alarmbot right on the ramp so it can spot anyone sneaking too far up A Short, or even a whole team executing at once. You want to put the Alarmbot on the ramp, not off the ledge beside it because it won’t detect enemies within its flat radius off the ledge.
However, that small corner is a perfect place for a Swarm Grenade, with a more traditionally placed second Swarm Grenade at the end of the ramp making sure any attempt to dodge Killjoy’s damage is futile. Another popular spot for a second Swarm Grenade can be in the two typical spike-plant destinations on A site. Activate the grenade as soon as you or one of your teammates hears the spike-planting audio queue.
For turret placement, there truly is no beating the classic spot. Throw the turret down at the very end of A Rafters facing towards A Short. This spot is so hard to clear the turret as an attacker even if you know it is placed up there. On top of that, if someone goes to clear the turret, that is one less attacker you have to worry about trying to trade you.
Split B Site
Split lends itself to Killjoy’s kit on the defensive side, especially the B site. The nature of this site, with its huge chokepoint out of Garage combined with so many vertical elements for cheeky turret placement, can be a Killjoy main’s dream.

You don’t have to worry too much about getting fancy with your Alarmbot placement here. As long as the Alarmbot activates first for any major push through Garage, it’ll give you the perfect window to activate your Swarm Grenade for a ton of damage and alert your teammates of the push. If you’re worried about your enemies shooting your bot down before it can work its magic, try placing it right on the other side of the wall into B Garage, on the side closer to Heaven.
For B setups, we recommend placing a singular Swarm Grenade right on top of the sewage pipe so it’ll hit anyone trying to come through the chokepoint. Activate it, again, half a second to a second after your Alarmbot goes off or is destroyed.
The fun and arguably most head-scratching part of any Killjoy defensive setup comes with turret placement. Luckily on the B Site of Split, great options are abundant. Above you’ll see we went with old reliable, placing the turret right next to the entry choke, but you can realistically place it on any number of those boxes to make sure attackers can’t prefire the same spot with each push.
Keep the turret stacked on boxes with a higher sightline than your agent’s own height.m On a map like Split you’ll never want it to be sitting on the ground.
The big takeaway with the turret is to try and keep it out of sight from the main chokepoint. Yes, it can be nice having Killjoy’s turret give intel by spotting enemies early, but unlike on A Site, where we used the Turret for the same initial purpose, on B Site your enemies have a safer spot to easily shoot the Turret down before making contact.
Put your second Swarm Grenade in a typical B site plant location to delay your enemies from getting the spike down.
That’s all for Killjoy Split defensive setups. Share this guide with anyone you know looking to pick up Killjoy in VALORANT.
The perceptive readers will notice there is no setup for mid-defense on Split with Killjoy here, and that is for good reason. If you’re picking Killjoy, don’t play mid-defense. Her turret doesn’t have any good spots to maximize its damage, and it is too difficult to set up a trap with her Swarm Grenades based on the spawn wall in mid.
You’ll get much more value using her powerful abilities to lock down a site, which is the best way to play around and even create your own best Killjoy Split setups.