Viper is one of VALORANT’s most versatile agents, who can play in a myriad of styles to suit the needs of her team.
That said, the core element of playing Viper is bending all of her poison utility to your will, placing it carefully around the map to throw your opponents off guard. She is a controller agent after all, so blocking pathways and forcing enemies into tough situations is her bread and butter.
Though Viper isn’t a must-pick on Bind, she is still very much in the meta as a secondary controller on the map, alongside a Brimstone, Omen, or even Harbor. Here are some setups for Viper to maximize the usage of her utility on Bind.
If you’re looking for lineups for your Snakebites, check out our lineups guide for Viper on Bind.
Best Viper setups for Bind A site
In order to create and understand the best setups for any map on any site in VALORANT, it’s important to visualize the geometry of the site in question and ask: what are the areas of the site that are most beneficial to have control over?
If you’re a defender, you want to prioritize not giving up those areas. If you’re an attacker, those areas should be your first goal when entering the site.
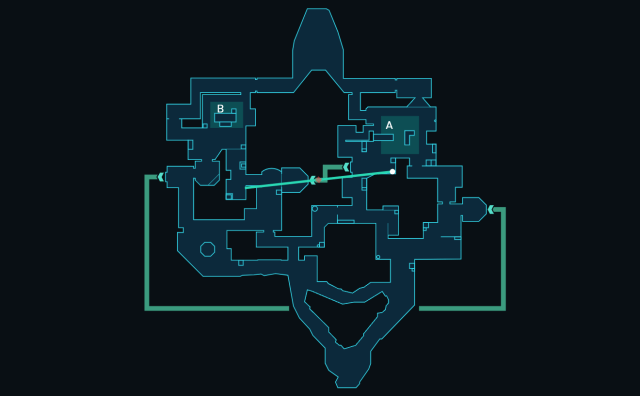
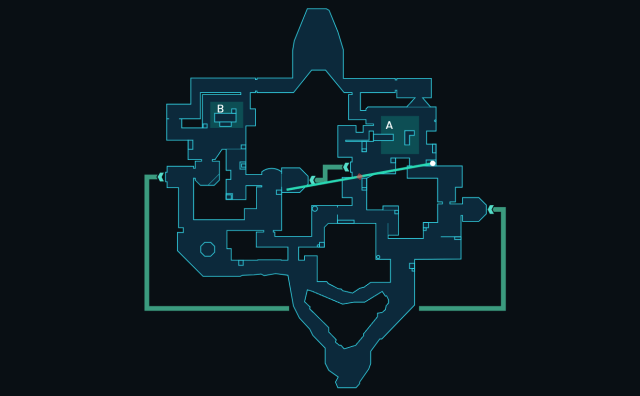
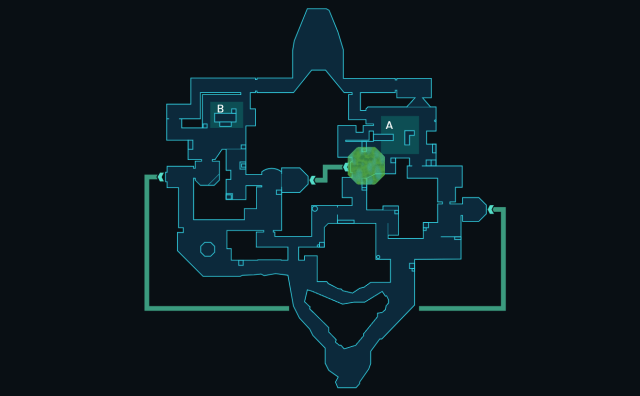
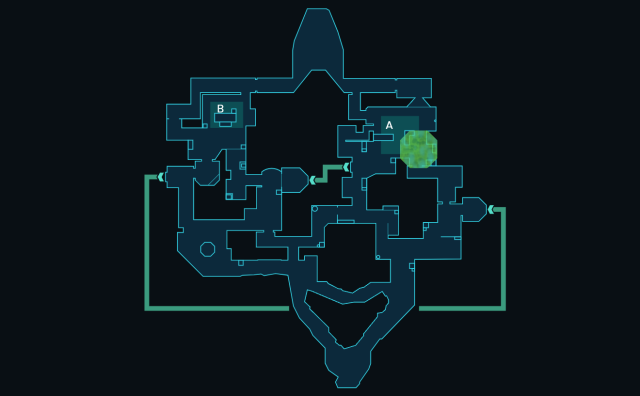
If we take a look at Bind’s A site, the most prominent areas of control are Lamps, often called “U Hall” and Triple. The most commonly targeted places to plant the spike are also right next to both of these areas. Here is how you can set up your Viper utility to protect both of those areas.
Bind A site attacking setups
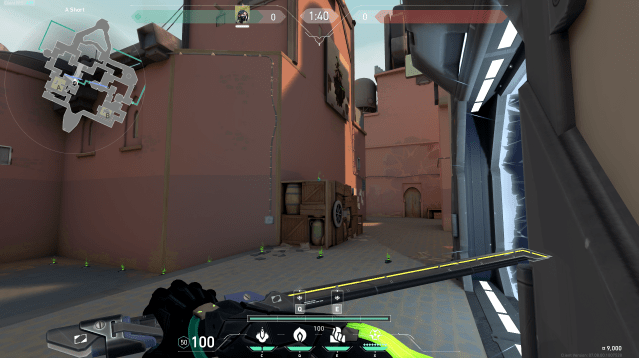
If you’re trying to attack on A site, there are two Toxic Screen setups essential to any Viper main’s kit. Both of these walls will help your team secure an entry and spike plant on to the site by essentially dividing it in half.
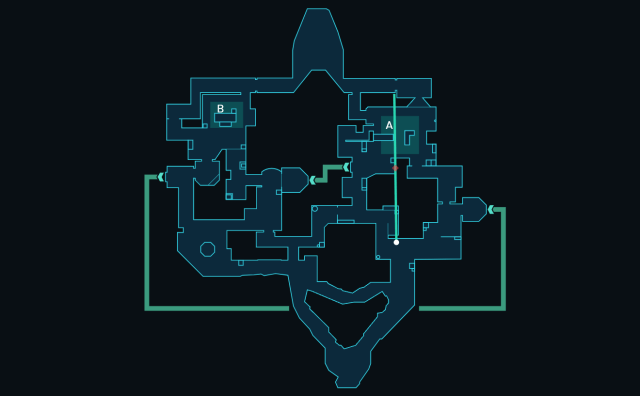
The first wall should be used if your team plans to plant the spike outside of Lamps, right under the cover of the truck, the other main fixture on the site.
The second wall is perfect if you plan to plant right outside of Showers, in the corner area of the triple box formation. The only caveat of this wall is it leaves Heaven open, so make sure your other controller is putting a smoke there, or try to hurl a Poison Cloud of your own up top.
These walls are both excellent choices. The best part? They are both super easy to set up and can be positioned perfectly from the safety of deep on the attacker side. As mentioned before, both of these walls essentially divide the site in half.
If you’re not putting your Poison Cloud orb in Heaven, which we only would suggest doing if there isn’t another controller player on your team who can, these are the best spots for Poison Cloud on A site.
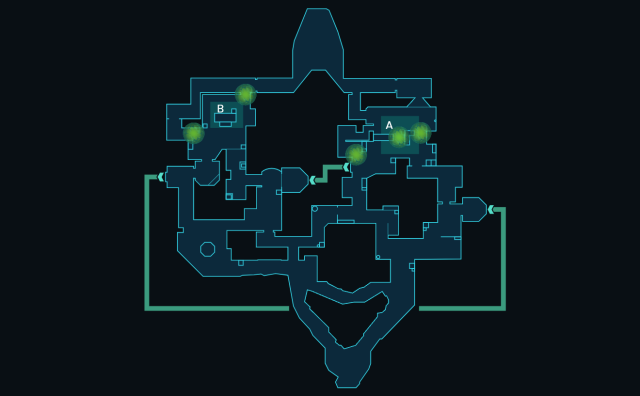
Placing one smoke right outside of Lamps is excellent for cutting off a large part of that space from defending enemies. The other smokes in the image, towards the right side of the site, serve as extra insulation and cover for your team, but be careful of enemies pushing right up to their edge, or even inside them.
Remember, the key to a successful attack setup on Bind is to divide the site up based on those priority areas where you’re looking for control. You’re rarely, if ever, going to plant the spike in one of the back quadrants of the site, so instead use your utility to secure only the areas that truly matter to your team’s strategy.
Bind A site defending setups
Defending A site on Bind is personally one of my favorite things in all of VALORANT. It is so fun and easy to get great use out of Viper’s utility on this site, it feels like some of the chokes were just made for her.
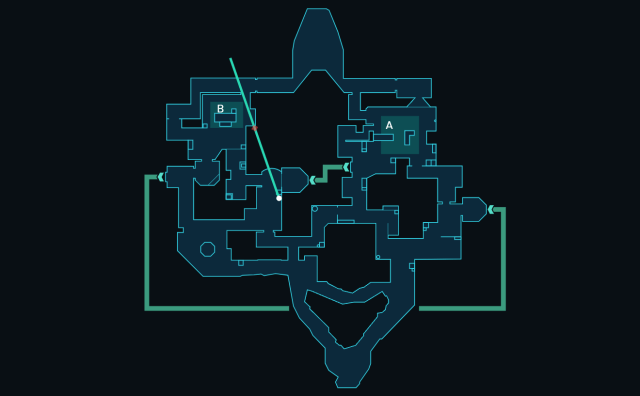
First up is my favorite wall in the entire game, the wall that stretches all the way from A main to the entrance of hookah on B site. This wall is fantastic for preventing quick rotates since it basically cuts out the entire middle area of the map.
This wall forces your enemies to go the long way on to both sites, giving you not only a massive area of control but also allowing you to feel less “stuck” by committing a wall placement to just one site.
To set up this wall, stand facing the teleporter in the middle of the map, and aim so the wall completely covers the small entrance to hookah. It’s okay if it doesn’t cut perfectly inside the teleporter. Look on your minimap for the ideal setup.
With this wall, it is great to put a Poison Cloud right outside of Showers, in case the enemy team decides to rotate that way after seeing that A main is cut off.
This is an ideal Viper setup for A site defense, but if you want to mix it up, there are a few other things you could try.
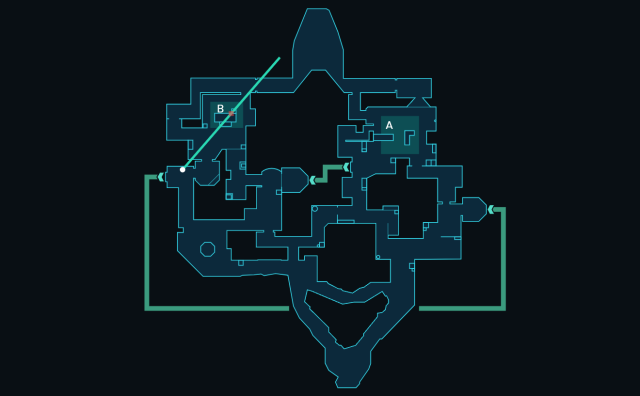
You could use your wall to cut off both entry points into A site instead of using part of it to cut off hookah. This gives you more control over A site, but leaves other areas vulnerable, and also comes with the downside of having both site entrance points being controlled by the same piece of utility, meaning if the wall goes down you need eyes in both places.
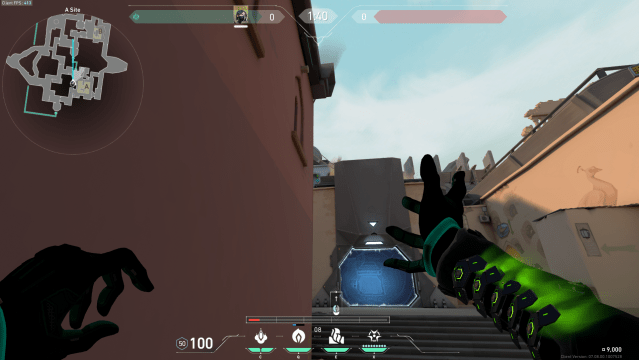
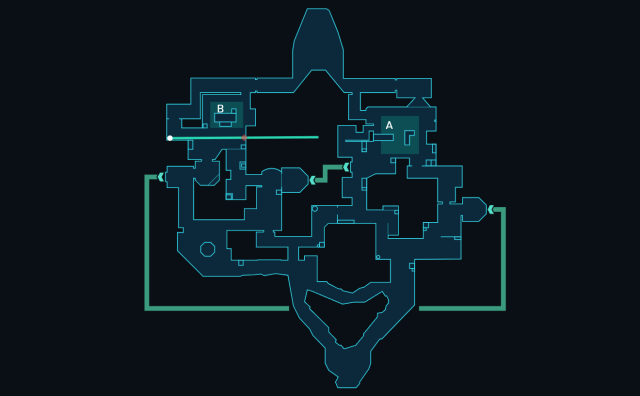
You can also try the classic one-way smoke in A main, though this takes a bit of practice before you can set it up correctly. Unlike Omen and Brimstone, who have the ability to remotely and precisely place their smokes, Viper needs to get up close and personal if she wants her smokes in the perfect spot.
The smoke can be placed just on top of this small box in A main, and allows you to still see enemies’ feet without them being able to see yours. You’ll have to practice underhand throwing the smoke in just the right spot so it lines up with the crates.
The best places to use your ultimate as Viper line up exactly with the two areas of the site we’ve been emphasizing. These ultimate placements are great for both securing and defending a spike plant. They also work as a great way to deter enemies from entering the site at all when used defensively.
Best Viper setups for Bind B site
B site on Bind is another challenge, as the site feels less like a playground for Viper and more like an obstacle course. Yet, there are still innovative ways to use her poison here, you just might have to think a bit more creatively.
The most prominent areas for control of B site are hookah and elbow, but your main job as a controller is going to be cutting off crucial sightlines here.
Bind B site attacking setups
If you’re choosing to push through hookah to attack, you’ll have to cut off three main points to ensure your safety: the entrance to elbow/halls, the main window into the defender spawn, and teleporter. Many controller and sentinel players will neglect to place utility outside of the teleporter in the middle of the map, but thankfully we have a Viper wall that’s got you covered.
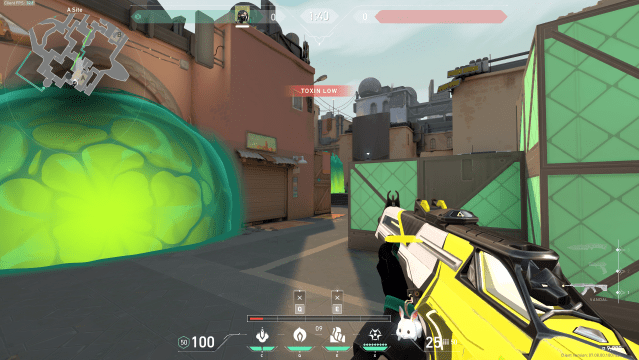
This Toxic Screen can be placed from outside of hookah, which provides the advantage of a generally safe area to get the lineup just right, but also means that once you place the wall your enemies will know where you’re trying to go. The main weakness of this wall is it gives players a small area to hide on the right side of B site, so just make sure you clear that small inlet once the wall goes down.
Otherwise, this wall is great to use in tandem with another controller smoke on elbow, as it’s a bit difficult to throw your Poison Cloud all the way over there on your own.
This second wall option is a bit unorthodox, but can work if your team has players pushing from both hookah and B long. This wall cuts off two of the three main points, but leaves a lot of space behind it for enemies to position to be ready when it drops.
As with any Toxic Screen placement, you’ll want to make sure you’re communicating with your team when the wall goes down.
Both of these B site smokes are reliable for a post-plant on an attacking round. They cut off the two major points of entry from the defender’s spawn, and can be used alone or in tandem with Toxic Screen for maximum site coverage.
Bind B site defending setups
As a defending Viper on B site, we recommend working your way through elbow and setting up a wall that will cover both of the main entry points to the site.
Though this setup covers a lot of the site, it does prevent your team from keeping an eye on hookah, so be careful of giving up that space. If you’re looking for a wall setup that not only wastes less length of the wall itself but also gives you a bit of coverage on both sites, you might want to try the wall through the teleporter.
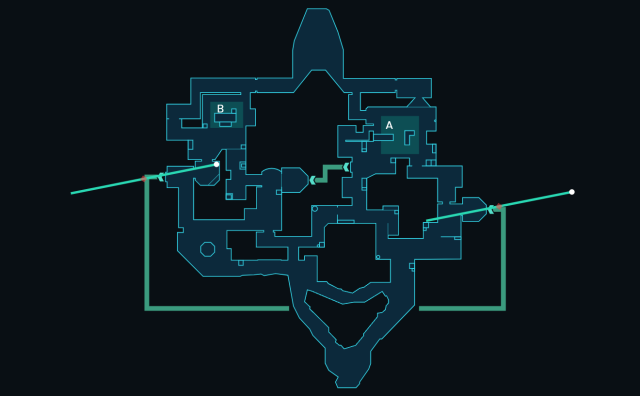
This wall offers a bit of an innovative strategy that is the opposite from the teleporter wall utilized on the A site. This wall will give you coverage of the outer parts of the map, but leave your team vulnerable in the middle.
Setting up the Toxic Screen in this way also presents a bit of a challenge in itself. While all of these other wall setups can be done well before the end of the buy round, this wall requires the gates of the teleporter to be open, which only occurs once the round actually starts.
You want to make sure when you stand in B garden, you aim the wall so it shoots straight through the teleporter. Wait for the gate to open, shoot the wall, and then head back to your position.
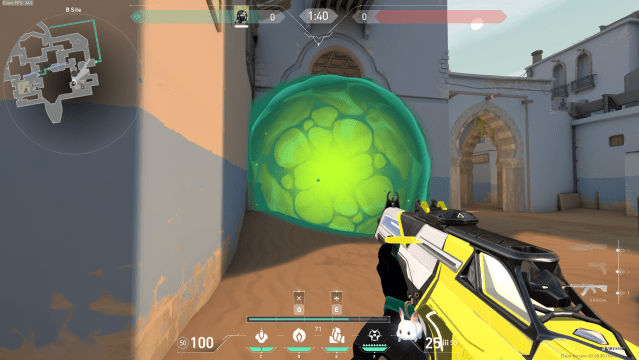
You can combine the teleporter wall with a Poison Cloud just inside of hookah, but this smoke also takes a little bit of time to set up. Like the one-way smoke on A site’s defensive setup, you’ll have to line up the perfect underhand throw to get this one to lay just right.

Standing outside of hookah, you can line your crosshair up with the middle of the tiled roof on the inside to get your smoke to land comfortably inside the lip of the window. Make sure to throw underhand using right click so the smoke doesn’t go too far into hookah and instead sits right at the edge.

The best Viper’s Pit for B site covers the entire entry area and usual targets for a spike plant on the site. This can be used for both defense and attack in a post-plant scenario.
