You’re about to start a relaxing match of CS:GO, and just after you’ve planted your feet in the server, you get hit with the “VAC unable to verify” error. It’ll appear in the chat saying you were unable to verify VAC authentication and you’ll be ripped from the server with no way to get back in again before the match starts.
This occurrence usually leads to players thinking they’ve been banned by the ruthless Valve overlords, but fear not—VAC’s failure to verify doesn’t mean you can start using cheats. Matches won’t launch without verification, so you’ll have to fix it.
Don’t worry, we’ve all been there, we’ve survived the scare, and we know how to fix it. Thankfully, the solution is relatively easy for CS:GO players.
What the “VAC unable to verify your game session” error means in CS:GO
The ‘VAC was unable to verify your game session’ error can simply mean your files aren’t installed correctly, confusing the VAC system. The authentication error is essentially Valve’s anti-cheat pinging that game files don’t match up the way they should. Valve’s anti-cheat is the barrier preventing cheaters from prospering in your CS:GO matches. This anti-cheat system is built to determine whether your in-game files have been tweaked to give an unfair advantage.
VAC isn’t as powerful as kernel-level anti-cheats like VALORANT’s Vanguard. While Vanguard polices your background programs, VAC typically doesn’t delve deep into your PC. It mainly relies on CS:GO’s game files but can also detect third-party changes. When VAC casts its light upon you, thus removing you from servers, it may not mean you’ve actually cheated. You just have your files a bit messed up, but they can be fixed in no time.
How to fix “VAC unable to verify your game session” error in CS:GO
Some quick fixes to this recurring problem include changing your Steam name, changing your Steam profile picture, opting in and out of a beta patch, and verifying the integrity of game files. I’ve had years of experience with this error, and odds are I will have more cherished moments with VAC’s authentication.
Follow these steps and you’ll be back to bottom-fragging in no time.
Close down CS:GO, you’re not playing anyway. Restart your Steam client, and make sure you haven’t any ill-timed updates to complete. Those updates themselves could push through a fix for your issue. Also, the latest version could be what caused the error. Knowing if it is up to date could prove helpful.
Firstly, close down CS:GO, you’re not playing anyway. Restart your Steam client, and make sure you haven’t got any ill-timed updates to complete.
First, do a VAC ban check
You might have actually been banned, so let’s get this check out of the way first.
- Go to the Steam launcher and click on ‘Steam’ in the top left corner of the screen
- Click ‘Settings’
- Go to the ‘Account’ tab
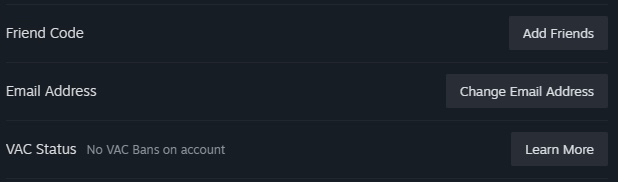
- Check the ‘VAC Status’
Reading, “No VAC Bans on account” means you’re clear.
Change your Steam profile picture and name fix
This is a peculiar fix that could alleviate your problems. Here’s how to change both your profile picture and name in Steam to get back to your game.
- Navigate through the Steam launcher and hover over your profile name
- In the drop-down menu, click ‘profile’
- Click ‘Edit Profile’
- In the General Tab, you will be able to change your name
- In the Avatar Tab, you will be able to change your avatar
It is an odd solution and if it works, you can change your name and avatar back to what you had.
Forcing a beta patch fix
Not opting into the right beta patch could be the reason your game is having the VAC error. Let’s get that fixed.
- In your Steam Library, right-click on CS:GO, and in the drop-down menu, click ‘Properties’
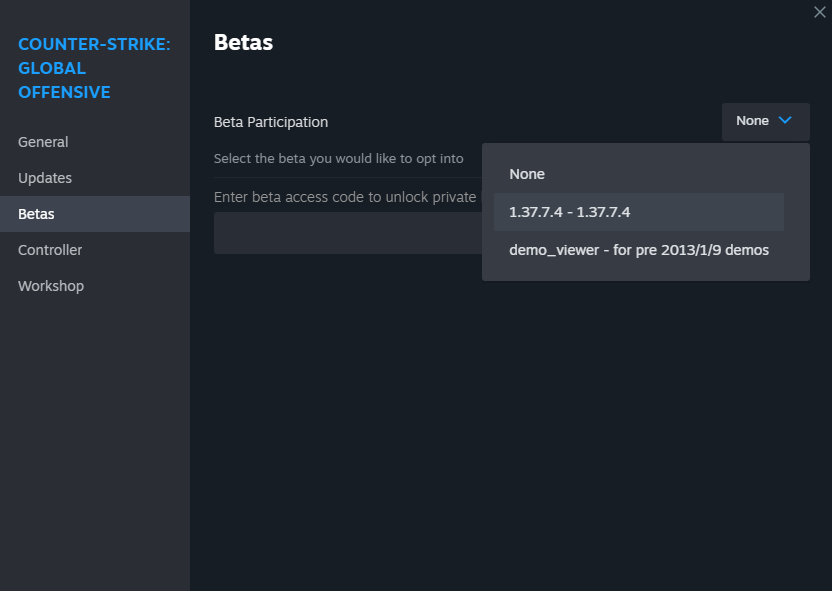
- Click the ‘Betas Tab’
- Hover your mouse over ‘None’ and choose the latest patch
- Wait for the update and open the game
- Once you open the game, closeout and navigate to the ‘Betas Tab’ again
- Opt out of the beta and start your game again
We all need a jumpstart sometimes. This might help but if not, see more options below.
Verify Integrity of game files fix
Sometimes it’s as simple as an update. Many times, this was the solution that helped us the most and took around five minutes to solve. Follow the steps to update your game.
- Head to your Steam library and right-click your game
- Select ‘properties’ from the drop-down menu
- In the menu, click ‘Installed Files’
- Navigate and click on the ‘Verify integrity of files’ button

Once you’ve hit that button, you’ll have to wait for a few minutes or more depending on the state of your PC. As soon as it’s done, you’ll be able to restart the game.
CS:GO will start an update as you load up the game. This will only take another 30 seconds. Once that’s done, you should be able to reconnect to your match.
Before you load up CS:GO again, make sure to restart Steam again, to be safe. If the VAC error continues to appear, reinstalling CS:GO is your next best option. It’s tedious and it might take longer than you hoped, but a fresh restart of CS:GO will ensure VAC is re-installed as well, which should clear up any more issues.
Reinstall CS:GO
The Ol’ faithful solution. Reinstalling the game, which seems obvious and trivial, can sometimes be the magic solution we need. Reinstalling can bypass any error-causing files creating issues with the game’s VAC verification.
- Open Steam Library
- Right-Click CS:GO
- Select Manage, click Uninstall
- Restart Computer
- Right-click on CS:GO in Steam and click Install
Other “VAC unable to verify” fixes
If game file integrity verification and a fresh reinstallation of Counter-Strike don’t work, you may have to contact Valve about your account since something on its end might be affecting your account’s ability to get VAC verification.